A quick guide to 'Quick Mask'
We we're asked recently for some advice on cutting people out of photos. So we've made a quick tutorial using Photoshop.
Firstly... When you chop people and objects out of images try to think of what you're doing as creating a selection area. A good chunk of your image is going to be redundant so the quality of what you want from that picture entirely depends on how good your technique is and the quality of your photo (the resolution of your image).
We don't doubt that there are many different ways to do this but we're going to show how we do it. All you need is Photoshop, the image you want to chop up and another image or another design to pop your cut-out on. To show you how to do this we're going to use a picture of Jakob... he's one of our directors sons... a real sport!
Step One
Once you open Photoshop hit 'Q' on your keyboard or the icon highlighted in the image below. After that it's rather simple, highlight the area you want with your brush tool.
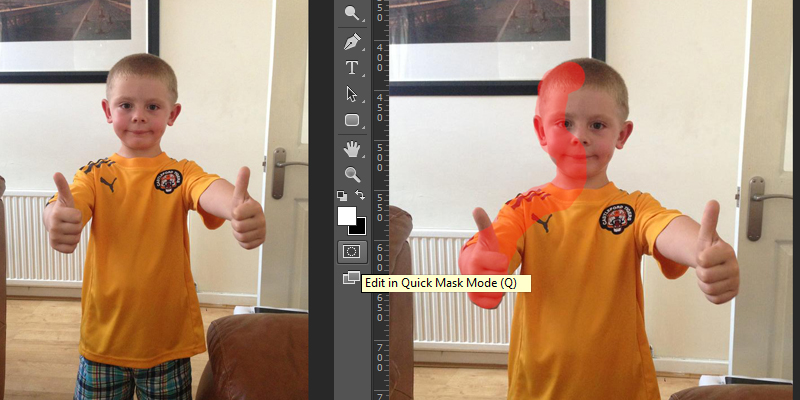
Step Two
Don't worry about going "out of the lines" or selecting areas you don't need. You can use the eraser tool later to cut those out. If you don't want to do that then you can alternatively change the size of your brush tool to highlight the more detailed areas. Once you've finished that, hit 'Q' again or the icon shown above and you'll see it changes to a selection area.
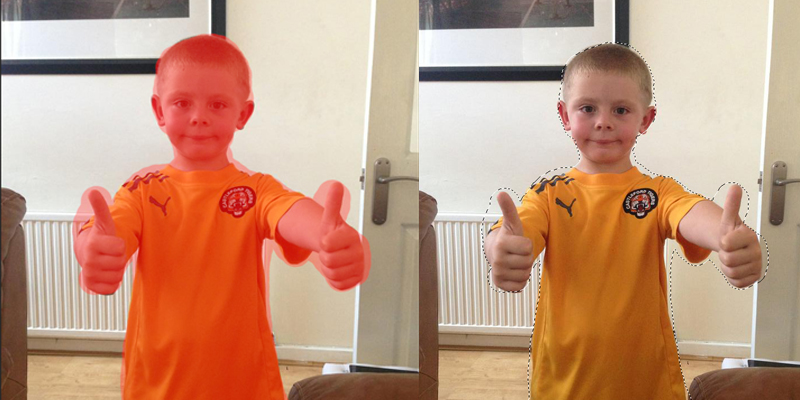
When you've done this you should notice that your selected area is everything you haven't drawn around using the 'Quick Mask' function. Now I like to carry my selected area across to something I've previously prepared so what I would do here is hit "Select" on the bar at the top and invert my selection [or hit Ctrl + Shift + I].
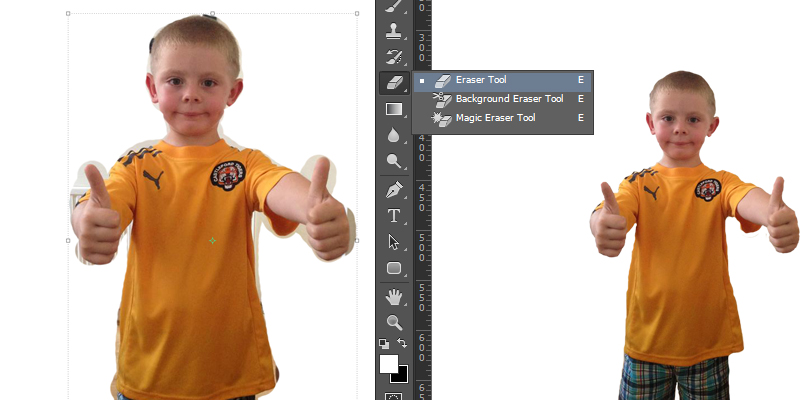
Step Three
Just hit the delete button and everything you don't need should disappear. Now, if you didn't use various sizes with your brush tool to select the detailed areas, use the eraser tool and clear the parts you don't need. Either way takes roughly the same amount of time but I tend to quickly cut out my images to see if they work well with my overall design. Try not to waste too much of your time cutting your image out unless your certain it's what you want in your design.
To finish off, either save your image or copy your layer and throw it into your final design. I've just simply thrown Jakob onto a gradient background, he seems happy anyway.
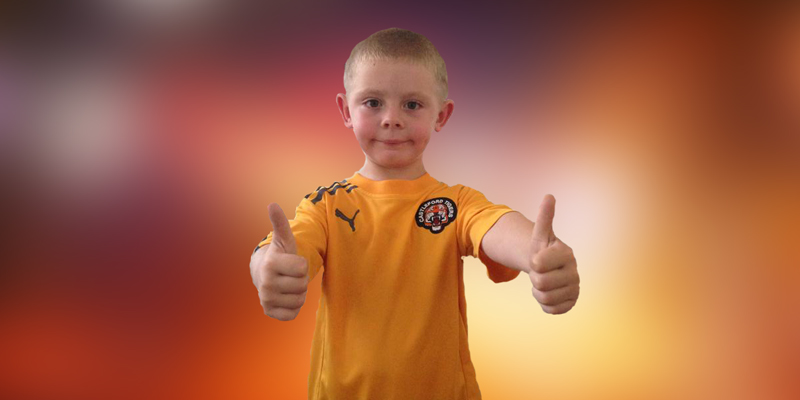
"Nice one Job Done" We hope that helps, if you need any tips feel free to scroll down and get in touch.


